

Replacing a Leaking Battery Pack and Defective Calculator Chip

Sometimes the collector acquires a less common calculator which is perfect except that the rechargeable batteries have leaked inside or part of the display does not light up. This is very frustrating, but what can be done about it?
Here Paul Scmidt shows what can be achieved with knowledge and care.
© 2015 Paul Schmidt
This is a new article which was not originally in "The International Calculator Collector".
Introduction
I used to collect vintage mechanical calculators in the early 70s in Germany until I had to sell them all to save weight when transporting all my worldly possessions to the States. I only have a vintage (1928) Burroughs key-operated adding machine now, as a sort of representative in my current collection of vintage calculating devices (which now has the usual abacus, slide rule, Napier's Bones, rotary adding machines) plus a small collection of electronic calculators starting with my first one (which was also TI's first model), bought around 1970-ish. Early on, I was buying new calculators every time the price would drop or new features were added. I cycled through the HP's, TI's, Rockwells, Sharps, Litronix's, Novus's, etc. These days I perversely use only modern TI's at home and only HP's at my engineering office... I can keep current with AOS & RPN (or infix/postfix).
I recently got the bug to try and reassemble the whole collection of devices that I had actually used in my personal calculating history. The only old one I still had was that first TI (kept for nostaligia), all the others had been thrown away or given away (and then no doubt thrown away). It took me a while to figure out which models I had owned, but websites such as the Vintage Calculators site and others helped a great deal. Then a bunch of eBay purchases followed, and only now within the last week have I been able to say that the collection is complete...
The Novus 4525 Scientist PR
The most difficult calculator to replace was my Novus 4525 Scientist PR. I had originally bought one upon moving to the States and tried to use it productively before giving up on it due to its many frustrating characteristics. It took quite a while before one showed up in eBay, and it was not working. Opening the casing revealed that the internal NiCd batteries had leaked all over inside and there was lots of corrosion throughout.
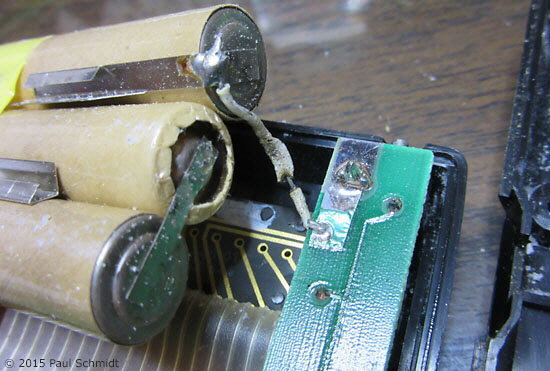
The NiCd battery pack showing melted insulation and Potassium Hydroxide deposits.
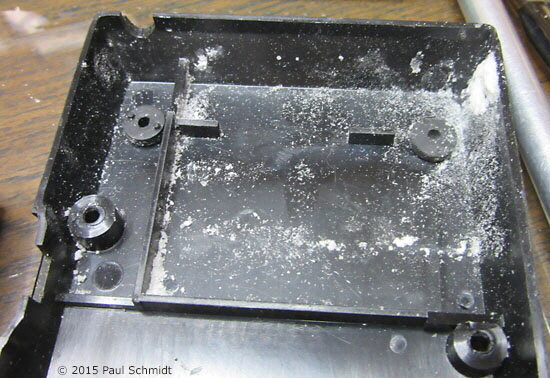
The rear cover of the casing had considerable Potassium Hydroxide deposits from the leaking battery pack.
Restoration of the Novus 4525 Scientist PR
I took the Novus 4525 Scientist PR almost completely apart and removed the corroded batteries.
To remove the Potassium Hydroxide which had leaked I flushed with vinegar followed by distilled water and compressed air. I did not treat the keyboard and the front half of the case as there seemed to be no battery leakage there and they are permanently attached together. All the leakage was restricted to the circuit board and bottom of the case.
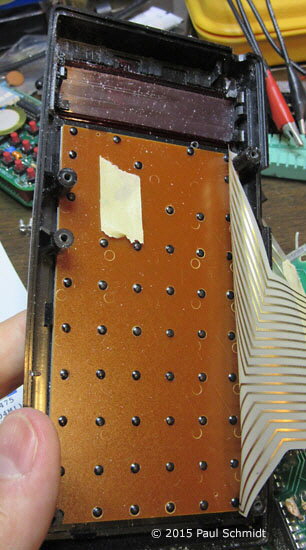
The keyboard and front of the casing are permanently attached together and, having virtually no Potassium Hydroxide leakage on them, were not treated with the vinegar and distilled water.
Note that the window which fits over the display appears frosted from this angle because, in this model, it has a Fresnel lens surface which helps with extra magnification to the small LED display digits.
I had vinegar in one flux bottle and distilled water in a second flux bottle. The process was slow and painstaking, since I worked on only a small area at a time. I used pillows of paper towel to soak up any fluids that might try to migrate or wick into areas where they would cause problems. I did allow fluids to flow under the ICs and other parts on the front of the circuit board, and made sure to blow dry using the air cans. Some IC pins had encrusted blobs of potassium hydroxide built up around them, and this might have been why the main IC failed when powered on initially.
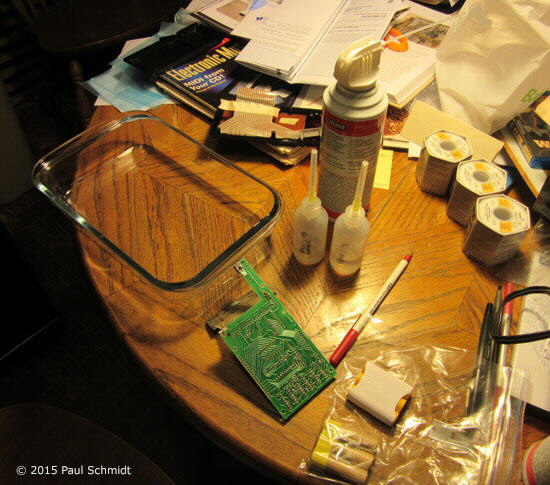
Everything ready to remove the Potassium Hydroxide residue from the circuit board: a glass dish, a flux bottle containing vinegar, a flux bottle containing distilled water, and with the air-duster can for drying off.
I had a new battery pack fabricated by a national chain which specializes in producing replacement batter packs, and fitted it.
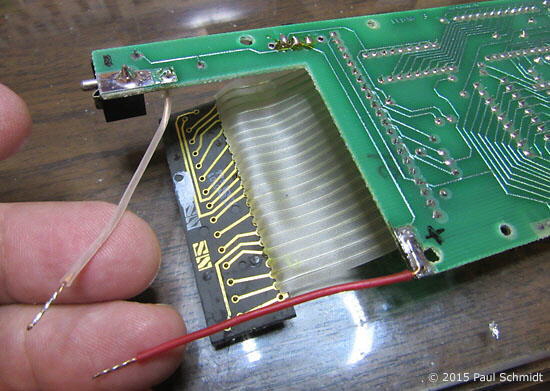
Battery pack leads replaced with new ones.
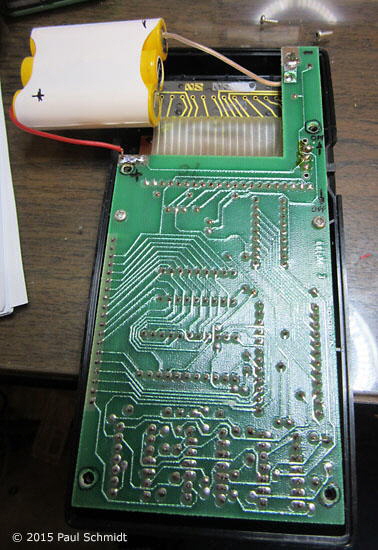
New battery pack fitted.
This brought the calculator back to life, but unfortunately a couple segments on each display digit were not lighting up. After using a scope to analyze the matrix scan pulses coming from the main IC to the display's segment driver IC, I determined that the main IC had partially failed. I was able to locate a surplus IC warehouse in Shenzhen, China that still had some, paid $20 for it and after installation everything was working again.
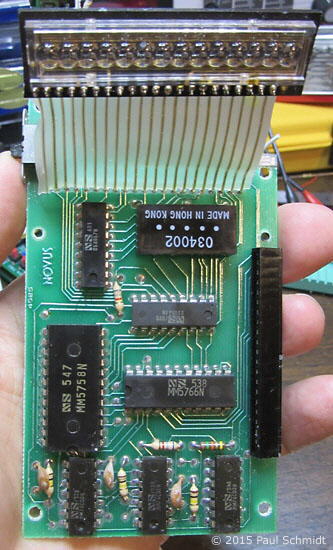
The circuit board with the integrated circuits. The faulty chip was the MM5758N IC on the left.
This shows prominently at the top the LED display with a lens to magnify each digit.
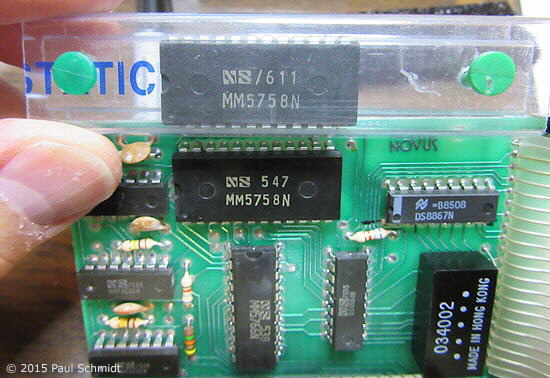
The new MM5758N chip in its protective anti-static tubing, ready to replace the faulty chip on the board.
I used a spring loaded solder sucker when removing the main IC. A couple seconds with the soldering iron on a pin, then placed the nozzle of the sucker over the pin, pad and soldering iron tip and pressed the trigger. Repeat for other pins. THEN I grabbed each pin end with needle-nose pliers and firmly wiggled it back and forth until the tiny amount of remaining solder broke loose. This method works well for me in general, but I always follow up a chip removal by using a DVM continuity checker to verify that there is still viable through-hole plating afterwards. And when resoldering the new IC, I take care to verify that good connections have been established on both the top and bottom of each pin, when applicable according to where the circuit board foils go.
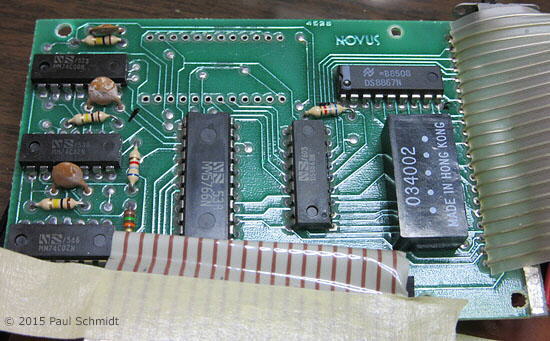
The faulty MM5758N chip has been carefully removed and the circuit board is ready for the replacement to be soldered in.
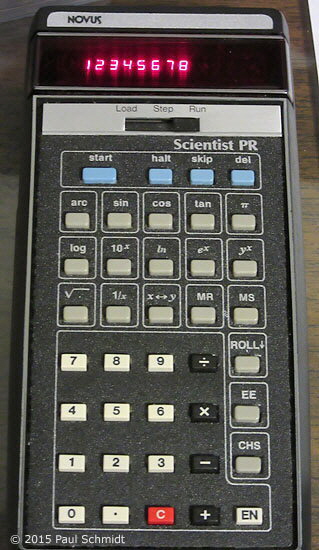
Success! The Novus 4525 Scientist PR is fully functional again with all the display segments lighting up.
Too bad the Novus machines were such dogs, because at least their upper tier machines had a nice look about them, good proportions, color scheme, keyboard layout, etc.
Copyright 2015, Paul Schmidt.
Calculator Articles
Vintage Calculators
Text & photographs copyright, except where stated otherwise, © Nigel Tout 2000-2026.